
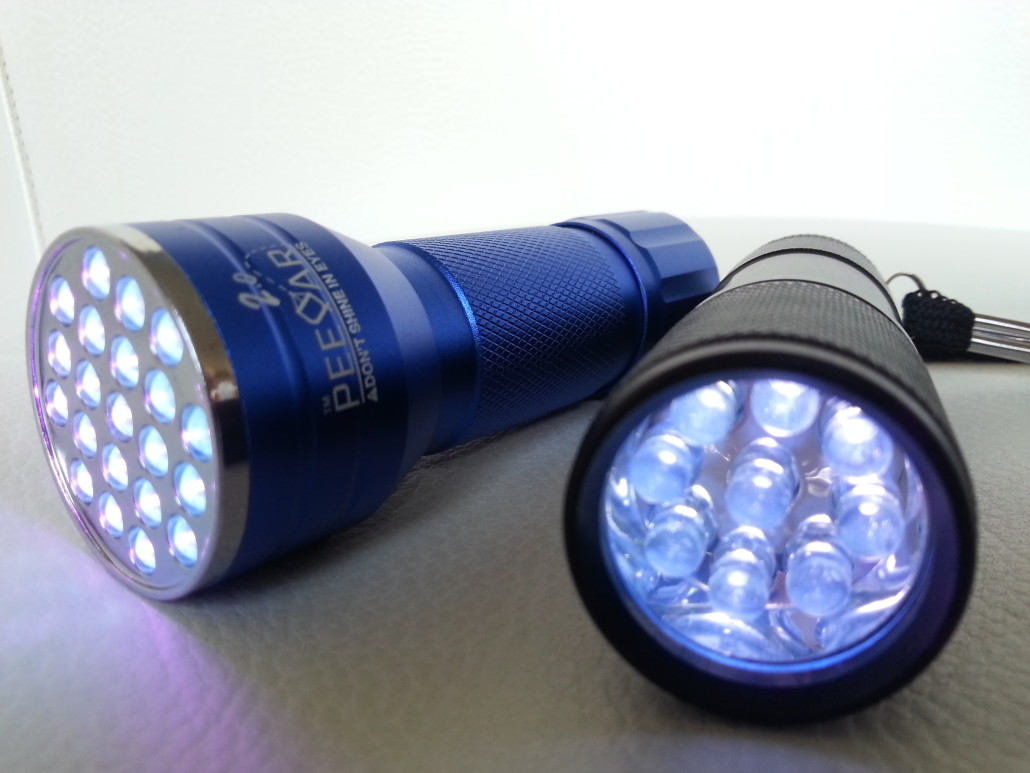
How To Correctly Install Batteries In My PeeDar Or PeeDar 2.0 UV Flashlight
If you’re getting frustrated at not seeing any light after placing the batteries in your brand new PeeDar, or PeeDar 2.0, don’t worry, it could well be that you’ve simply put them in wrong. So long as you have all the necessary working components this is a relatively easy and quick task to complete!
Firstly, check you’ve got the correct batteries. This is essential, incorrect batteries can lead to markedly reduced operating times or low/no glows. They’ll need to be fully, or near-fully charged, within their ‘use-by’ date (not ‘manufactured on’ date!) and AAA sized (8650 batteries also fit, but without the caddy!) so they can fit perfectly in the battery caddy. Using well known brand names, such as Duracell, Energizer and Samsung, is generally a good idea if you’re worried about quality and low, or unstable power output. You can use standard alkaline batteries or rechargeable, and even lithium (see our blog post on what the best batteries to use are).
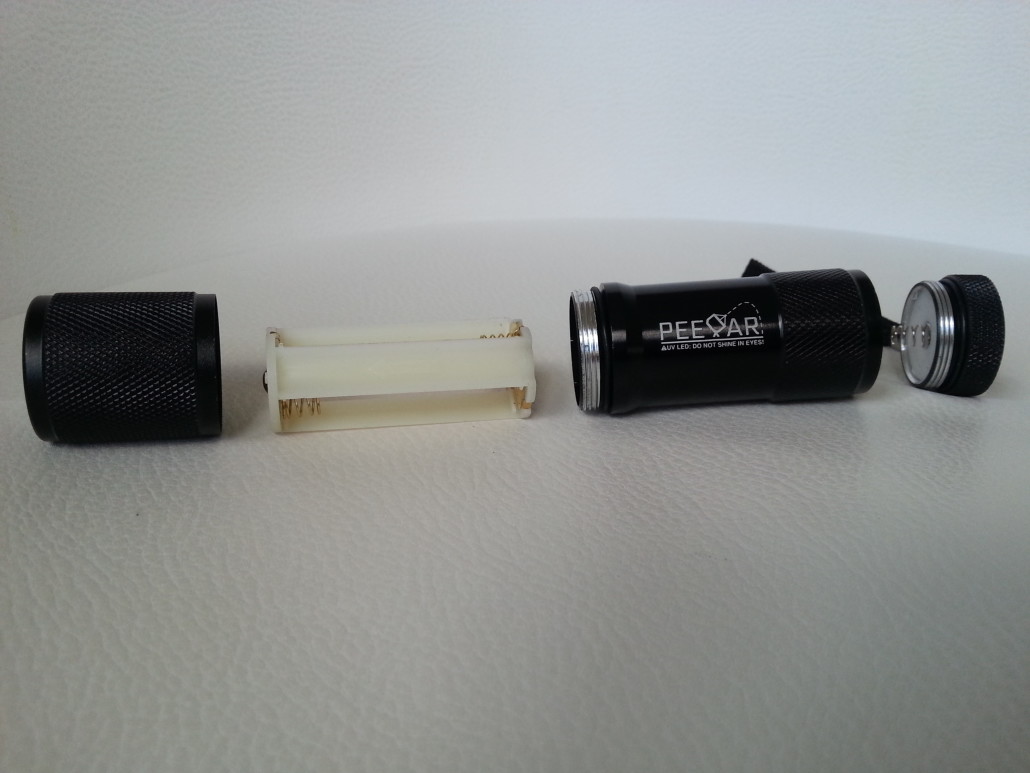
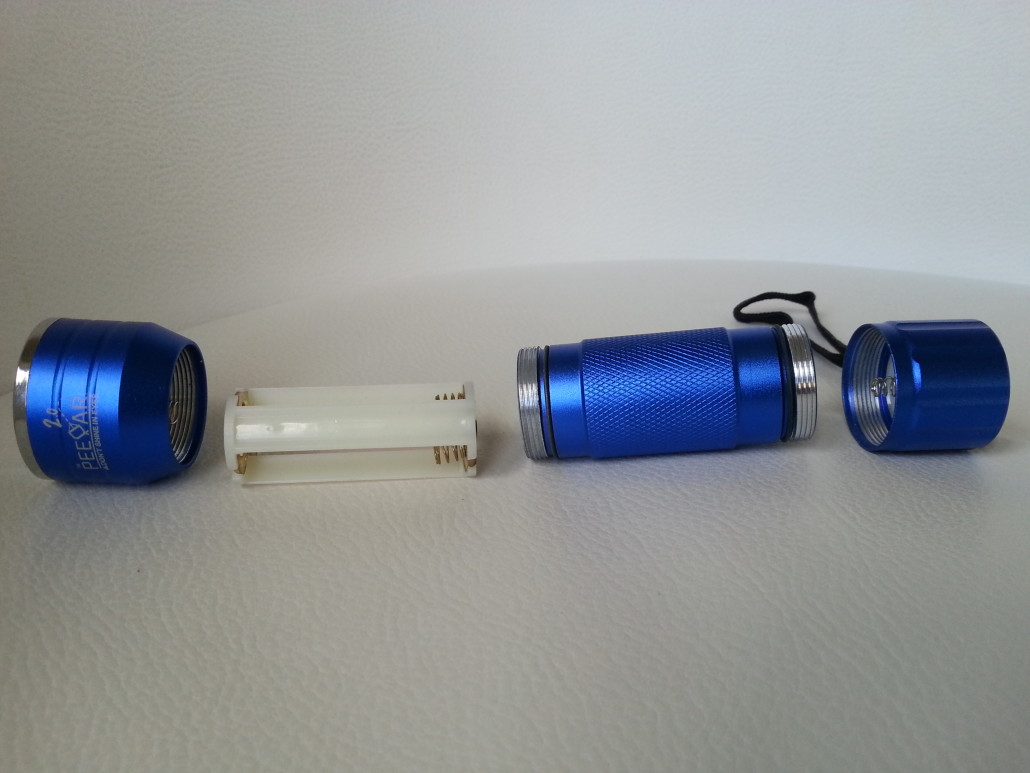
Next, ensure your PeeDar, or PeeDar 2.0, is not missing any parts, each torch should consist of (in order of left to right per image below):
- 1 x Head piece
- 1 x Battery Caddy
- 1 x Cylindrical shaft
- 1 x Clicker end, with leash
With a complete torch and the correct batteries you can now follow the four simple and easy steps below to correctly insert batteries into your battery caddy, and then place this caddy into your shiny new UV torch 🙂
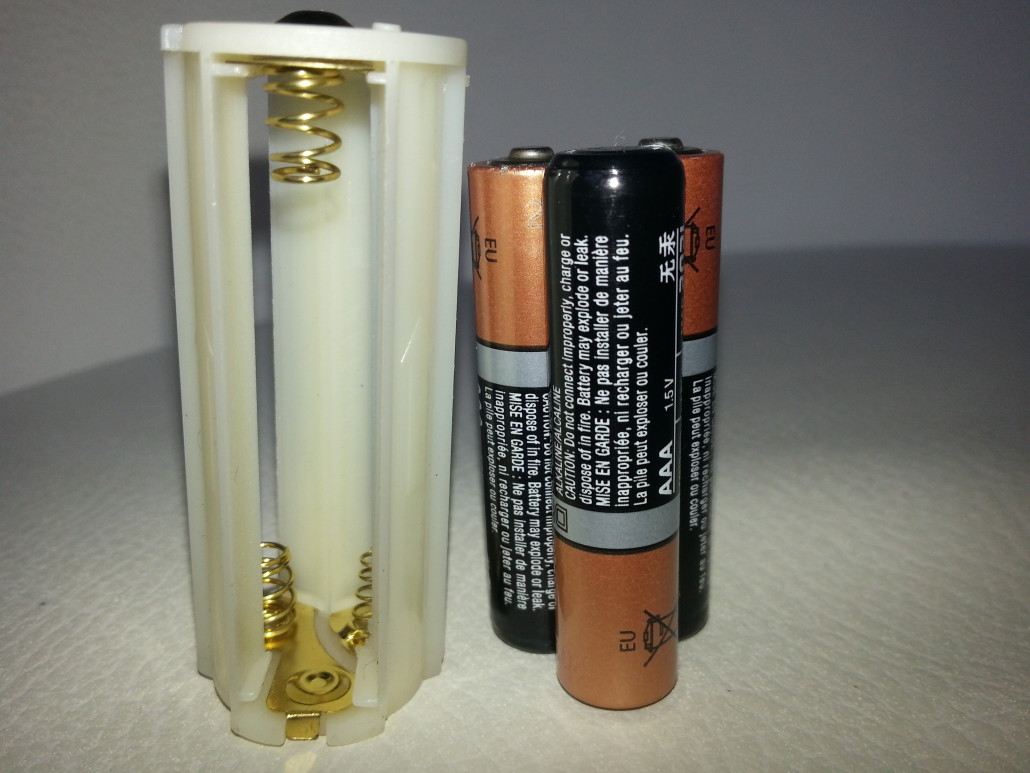
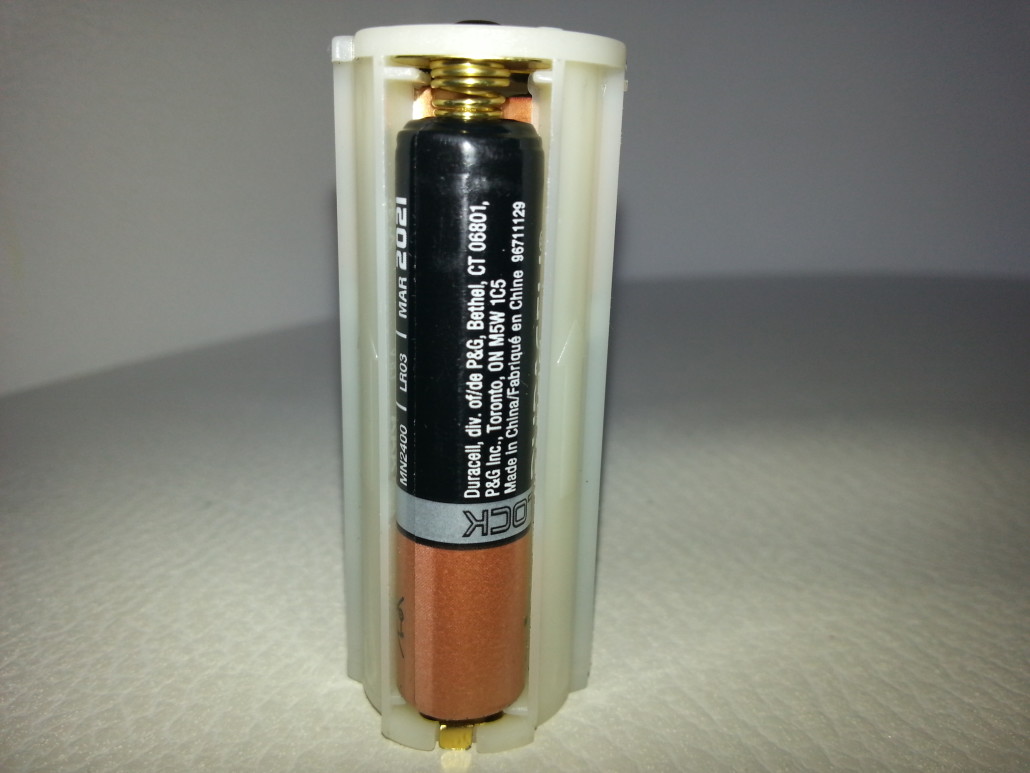
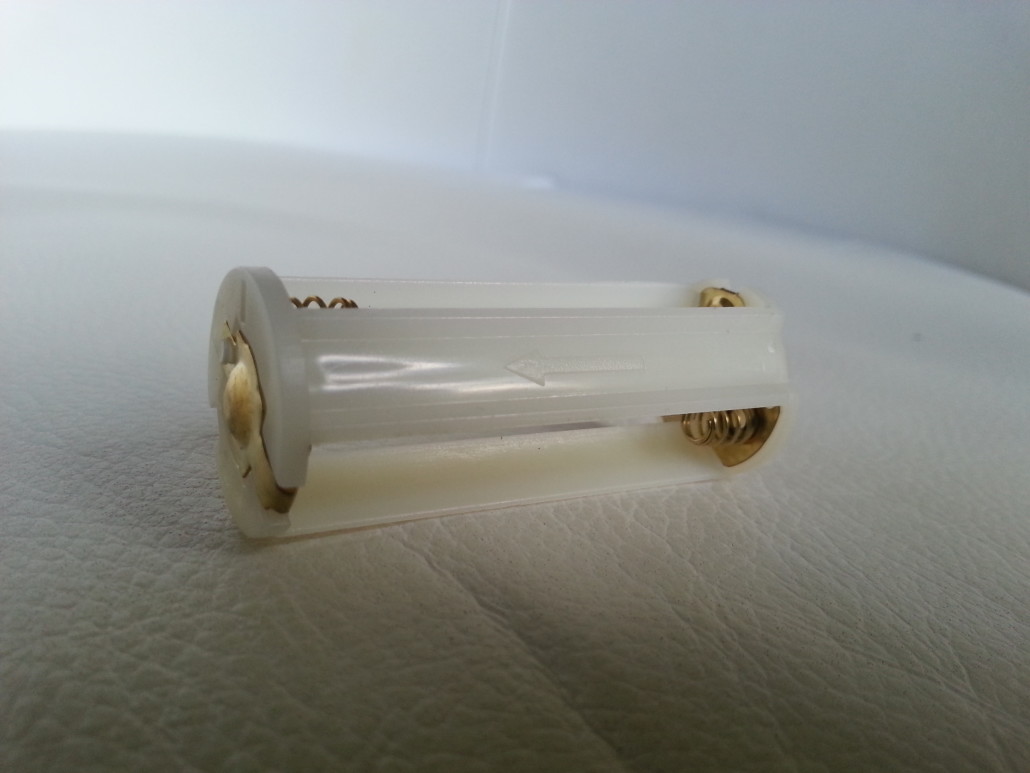
1. Your battery caddy should have a positive end, seen by the central outward protruding metal piece (and usually an indented “+” symbol nearby in the plastic), and similarly it should have a flatter looking negative end, with a protruding metal ring (there should be a negative “-” mark in the plastic too). Another way of distinguishing each end of the caddy, if the caddy is correctly constructed, is that the positive end has just one spring in one of the 3 battery chambers, whilst the negative end has 2 springs (each in their own battery chamber). A final way to determine the positive or negative end of the caddy is by looking for the embossed arrows in the out-facing plastic walls between battery chambers, all arrows point in the same direction, i.e. to the positive end.
2. Place your AAA batteries in each of the 3 battery chambers, each battery’s flat ‘negative’ end should sit against a spring, the protruding ‘positive’ end should sit against the chamber’s non-spring, i.e. flatter, end. When correctly inserted, 2 batteries should have their positive ends at the caddy’s positive end, and there should be just one positive battery end at the caddy’s negative end.
3. Roughly half way down the side of the barrel of the caddy there should be an arrow marking on the outfacing plastic walls, pointing to the caddy’s positive end. When the battery caddy is correctly loaded with batteries screw off the clicker end of the flashlight and slide the caddy in, placing the caddy’s positive end in first, i.e. with the arrow pointing to the head (LED) end. This arrow is in the positioning diagram on both the PeeDar and PeeDar 2.0’s packaging! Then securely fasten the clicker end back on the torch, and make sure the head end of the flashlight is tightly screwed on. You should now be able to switch on the torch by pressing the rubber button on the clicker end of your UV flashlight.
You should now see that your PeeDar, or PeeDar 2.0, lights up nicely when you press the on/off clicker switch, each LED beaming out that all important ultraviolet light 😀
4. If you find there is no light after following these instructions, repeat the above process 2 more times from scratch, to ensure you’ve gone through everything correctly. If after the third time you still have zero light emitted, use different batteries (preferably new, or failing that, ones you’re able to see work well in another electrical appliance). If there is still no light, even with new batteries, use our contact page on http://www.urineeradicationsystems.com/contact-us/ or contact us directly via your order in your Amazon account, we’ll then do our best to fast and effectively resolve your issues.
I hope this has all made sense, and that after following the steps above you’ve now got a fully functioning UV flashlight!

I’ve had a UV flashlight sitting in pieces for few years now, these instructions brought it back to life!
Hi Mike,
Many thanks for your message, so great to hear you found our newly created artilce on how to correctly place batteries in your UV flashlight useful and that you’ve got it working.
We wish you the best with your UV endeavours.